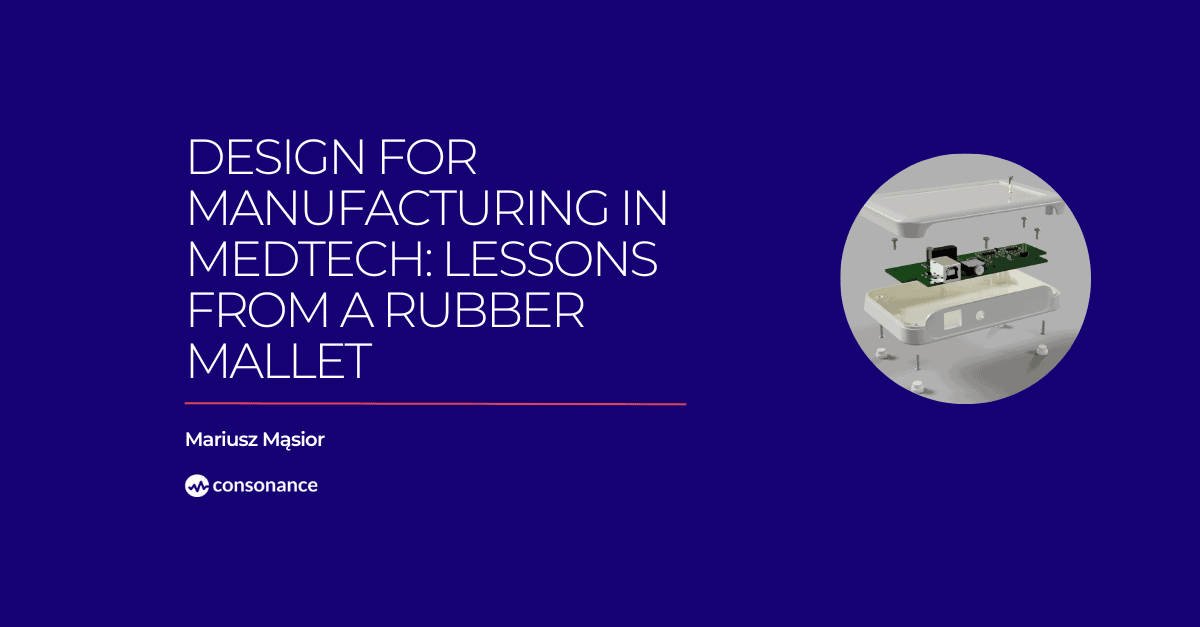
Design for Manufacturing in MedTech: Lessons from a Rubber Mallet
Mariusz Mąsior, CEO / CTO
16.04.2025
Design for Manufacturing is beautifully summarized by an anecdote. Some time ago a group of American automotive execs visited a Japanese car assembly plant. As they observed the line, they noticed that, like in the U.S., doors were installed at the end of the process. However, one thing was missing. In the U.S., a worker would tap the edges of each door with a rubber mallet to ensure a perfect fit. In Japan, there was no such step. Surprised, the Americans asked when and how the Japanese workers made sure the doors aligned perfectly. Their guide smiled and replied, “We make sure they fit during the design phase.”
If you stop reading here but remember that story, you’re already ahead with understanding this phenomenon. But I encourage you to dive deeper as the case is more sophisticated.
Design For Manufacturing in a Nutshell – Especially in MedTech
Manufacturing readiness is a complex, highly technical topic. But let’s focus on the key ideas to ensure your product isn’t impossible, expensive, unstable, or just frustrating to produce.
I’ll be discussing this from a MedTech perspective – my area of expertise for over a decade – but the principles easily apply across industries.
The “Outside-In” View of Product Development
Imagine building a new product that:
Combines mechanical, electronic, and software components.
Requires regulatory approval.
Needs to be manufactured and packaged.
Must be delivered to distributors and customers.
Most importantly: customers will want to use and enjoy.
This naturally seems like a linear process: invent → design → manufacture → sell (ideally with some grants and investor funding along the way).
This all looks good on paper. Auditors love it. But even with overlapping phases (like when validation reveals a flaw and sends you back to redesign), there’s one key element that gets overlooked: manufacturability from the start.Too often, teams only think about production at the end – as if it’s a separate “stage.” That’s how you end up with the rubber mallet story.
The “Inside-Out” View of Development
Now, let’s zoom in. What does product development actually look like in practice? Even in small startups, a surprising number of people end up contributing to development. Over the product’s lifecycle, that number could easily reach 20, due to team turnover and the need for diverse skills.
One person can’t master everything – mechanical design, electronics, software architecture, industrial design. But here’s the issue: there’s no such thing as a “universal production engineer” you can bring in to magically make manufacturing smooth.
Each production method has its own specific constraints. And engineers will naturally lean into what they know best – sometimes at the expense of a better solution (e.g., choosing welding over injection molding or 3D printing).
You also face integration hell: each component may work fine on its own, but once combined, things break or conflict. That’s when your team scrambles, fixes, and tests repeatedly… until it finally works.
In MedTech, certification becomes an additional bottleneck. You produce just a few prototypes, gather compliance data, stress during audits – and still haven’t solved for true production-readiness.
So how do we actually plan for scalable manufacturing?
Building with Design for Manufacturing in Mind
The most important takeaway: smart decision-making throughout development is the only path to a quality, cost-effective product. It’s not about perfect processes or pretty documentation templates. It’s about:
Excellent engineers with end-to-end product knowledge.
Clear communication and discipline in decision-making.
A strategic roadmap that allows room for deep work and smart choices.
Electronics prototypes design for medical devices
While specifics vary by product and technology, here are 10 universal Design for Manufacturing principles that consistently deliver results:
1. Design Simplicity
Keep designs as simple as possible without compromising requirements. Fewer parts mean cheaper production, easier assembly, lower error risk, and faster fixes. Use simulation software to test alternatives and validate your design before building.
2. Objective Evaluation of Design Options
You’ll face many decisions without full data. Still, assess every option based on two distinct values (don’t mix them):
Unit cost – Total cost per device at your minimum production volume, including materials, outsourcing, packaging, etc.
Startup cost – Investment needed for tooling: molds, fixtures, testers, etc.
3. Modularity
Design products as modules that can be developed and manufactured independently. It simplifies assembly and maintenance, while helping to avoid overdoing it. More modules can overcomplicate your system and violate the simplicity rule. Don’t chase reusability unless you have a large product portfolio with real synergy.
4. Use Standard Components
Design with standard parts whenever possible – they’re easier to source and assemble. Off-the-shelf components are widely available, generally affordable, and often more cost-effective in the long run. Even if they’re slightly more expensive upfront, they eliminate the need to design, test, and produce custom parts.
Unless there’s a truly compelling reason not to, always opt for standard:
Screws, nuts, pins, inserts, rivets.
Bearings, hinges, seals.
Connectors and communication interfaces/protocols.
These parts are well-understood, high quality, and easy to replace or upgrade.
5. Choose the Right Materials and Raw Inputs
Materials significantly affect both performance and production. Your choices impact cost, appearance, durability, and which manufacturing processes are viable.
Look for materials that are:
Readily available and cost-effective.
Consistent in quality and machining.
Suitable for your production volumes.
Aligned with your chosen technologies.
A thoughtful material strategy balances performance, manufacturability, and supply chain security.
6. Design to Simplify Production
Materials significantly affect both performance and production. Your choices impact cost, appearance, durability, and which manufacturing processes are viable.
It’s tempting to assume “someone else will handle production” – but you should still explore the alternative of building it in-house. Even if it’s not your business model, this perspective encourages your team to choose simpler, more practical solutions.
7. Manual Assembly
Manual assembly steps: wiring, soldering, fastening, cleaning and testing can account for 30–60% of the unit cost, yet they’re often overlooked. Everyone’s focused on the BOM (Bill of Materials), but labor matters too.
Automation may come up early, but don’t rush into it. In most cases, manual processes can support volumes 10x higher than you’d expect – especially in early production runs.
Overengineering for automation too early adds unnecessary cost and complexity. Start with manual assembly unless automation is absolutely required, and make sure your product is designed to support it well if/when you scale up.
8. Manufacturing Environment
Where your product is made matters – and should shape your design.
The product should be easy to build in your actual production space, whether it’s a cleanroom or a general-purpose factory. If specific conditions are required (like sterility or ISO cleanroom standards), your entire production plan – and product design – must be optimized accordingly.
Even for simple products, maintaining process cleanliness can reduce defects. That includes:
Moving semi-finished parts one way from dirty to clean, not back again.
Enforcing strict practices in clean areas (closed doors, no open windows, latex gloves, etc.).
PCB manufacturing for medical devices
9. Compliance and Regulatory Readiness
In MedTech, regulatory compliance isn’t optional. In the EU, for example, you’ll need to follow:
MDR (2017/745).
ISO 13485.
Numerous specific standards for electronics, biocompatibility, safety, and performance.
Make compliance a design requirement from the very start – not something you “add on” later.
Critically, you need to understand how compliance is evaluated, not just what the rules are. A common mistake is overshooting requirements (e.g., aiming for IP68 protection when IP22 is sufficient), which adds cost without benefit. Or fixing something that already passes, without verifying whether it actually failed a standard.
Standards are meant to define “good enough”. Stick to what’s required and prove it.
10. Continuous Improvement
Quality systems (and engineering pride) demand continuous improvement, but it’s easy to fall into extremes:
“It works, don’t touch it” – stagnation.
“Let’s keep optimizing” – overengineering.
Improvements should be intentional and data-driven. Don’t change something unless you’ve clearly defined:
The problem you’re solving.
The cost and benefit of the proposed change.
How you’ll measure its success.
A good practice is to conduct a retrospective analysis after each production run:
Identify errors, bottlenecks, or inefficiencies.
Suggest potential improvements.
Evaluate the cost/benefit of each.
Implement just one improvement and test it.
Reassess before changing anything else.
Article Summary
Some call Design for Manufacturing (DfM) a craft, others an – art truth is, it’s a bit of both. It’s certainly not easy. DfM requires attention, collaboration, iteration, and a lot of problem-solving – often fixing problems you accidentally created yourself.
But when the product finally works it is easy to produce, and nobody complains during assembly. That’s a great feeling, isn’t it? I’ve experienced it many times, and it never gets old.
Hopefully, this article helped you better understand what DfM is all about and that the 10 principles above will guide your next incredible project. (I’ve already got my fingers crossed for it.)
Design for manufacturing is one of your concerns? We’re here to help.
We use tasty cookies on our website to improve your experience. Hope you don't mind analytics too. Click “Accept All”or visit "Cookie Settings" to provide a controlled consent.
This website uses cookies to improve your experience while you navigate through the website. Out of these, the cookies that are categorized as necessary are stored on your browser as they are essential for the working of basic functionalities of the website. We also use third-party cookies that help us analyze and understand how you use this website. These cookies will be stored in your browser only with your consent. You also have the option to opt-out of these cookies. But opting out of some of these cookies may affect your browsing experience.
Necessary cookies are absolutely essential for the website to function properly. These cookies ensure basic functionalities and security features of the website, anonymously.
Cookie
Duration
Description
cookielawinfo-checkbox-analytics
11 months
This cookie is set by GDPR Cookie Consent plugin. The cookie is used to store the user consent for the cookies in the category "Analytics".
cookielawinfo-checkbox-functional
11 months
The cookie is set by GDPR cookie consent to record the user consent for the cookies in the category "Functional".
cookielawinfo-checkbox-necessary
11 months
This cookie is set by GDPR Cookie Consent plugin. The cookies is used to store the user consent for the cookies in the category "Necessary".
cookielawinfo-checkbox-others
11 months
This cookie is set by GDPR Cookie Consent plugin. The cookie is used to store the user consent for the cookies in the category "Other.
cookielawinfo-checkbox-performance
11 months
This cookie is set by GDPR Cookie Consent plugin. The cookie is used to store the user consent for the cookies in the category "Performance".
viewed_cookie_policy
11 months
The cookie is set by the GDPR Cookie Consent plugin and is used to store whether or not user has consented to the use of cookies. It does not store any personal data.
Functional cookies help to perform certain functionalities like sharing the content of the website on social media platforms, collect feedbacks, and other third-party features.
Performance cookies are used to understand and analyze the key performance indexes of the website which helps in delivering a better user experience for the visitors.
Analytical cookies are used to understand how visitors interact with the website. These cookies help provide information on metrics the number of visitors, bounce rate, traffic source, etc.
Advertisement cookies are used to provide visitors with relevant ads and marketing campaigns. These cookies track visitors across websites and collect information to provide customized ads.